We can't find the internet
Attempting to reconnect
Something went wrong!
Hang in there while we get back on track
Integrate QuickBooks Desktop with Ruby on Rails
Connecting to Quickbooks
An overview of the system architecture would be helpful here.
-
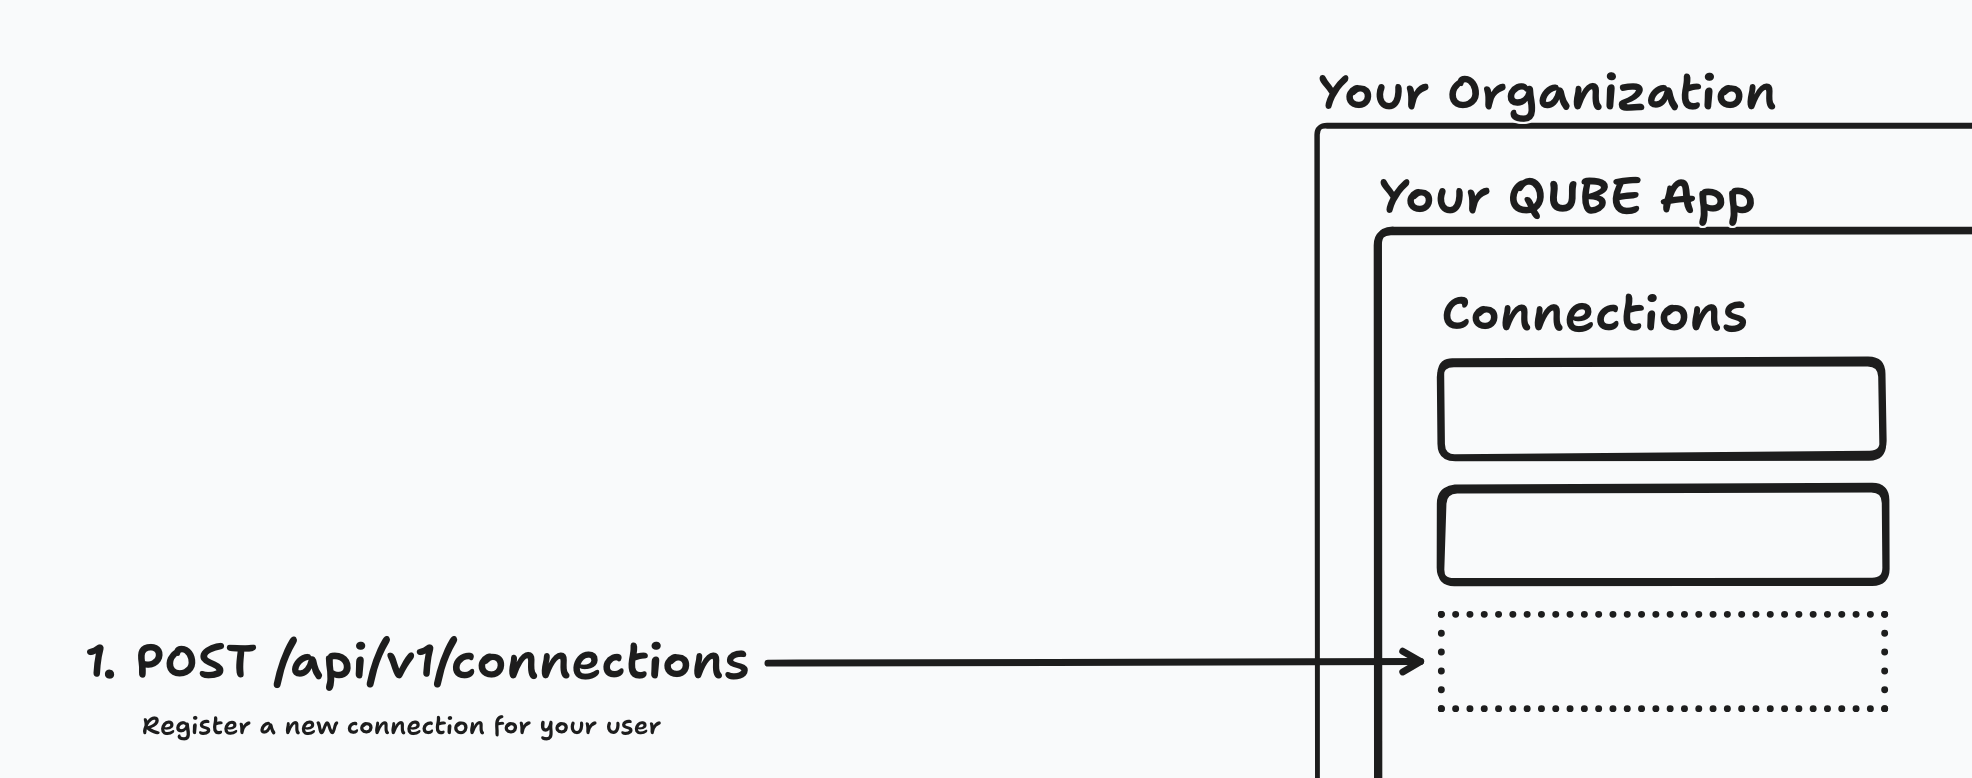
Create the connection. When your user wants to connect their QuickBooks account to your application, use the QUBE API to register a Connection in your QUBE Application on their behalf.
-
Get the QWC file. When the user has their Intuit Web Connector installed and running, you will provide them a QWC file to import. This file is retrieved via the QUBE API using the
connection_idfrom step 1, and allows the Web Connector to sync with your QUBE application.

-
Get a password. You will then use the QUBE API to generate a password for the connection, which your user will enter in their Web Connector.

-
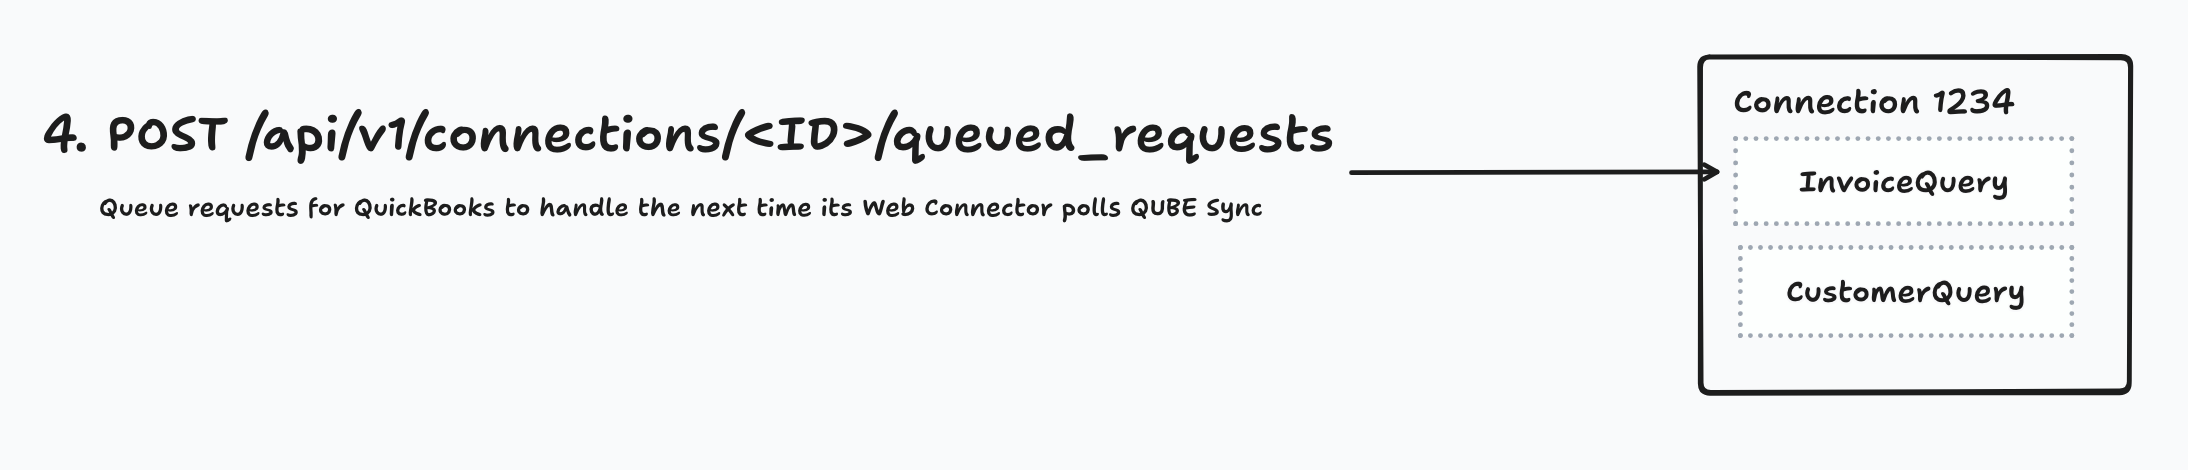
Send request(s). Your application will queue up requests to QuickBooks using the QUBE API, and the user's Web Connector will periodically sync with the QUBE SOAP server to retrieve and process these requests.
-
Receive webhook. If you passed a
webhook_urlwhen queueing a request, QUBE will send a POST request to this URL with QuickBooks' response when the request is complete.

Getting your API Key
To get started, you'll need to copy the API key from the application you just created in My Applications, and set it as an environment variable.

export QUBE_API_KEY=sk_more_characters_here
Install the QubeSync Gem
# Gemfile
gem 'qube_sync'
Allowing your users to start the process
You likely want a button somewhere in your application that says "Connect to QuickBooks Desktop". When the user clicks this button, you'll want to create a Connection in your QUBE Application on their behalf. You'll need a local model to store a reference for this connection.
rails g model QubeConnection qube_id:string user:references
The controller action might look something like this:
# QuickbooksConnectionsController#create
def create
  # ...
  connection_id = QubeSync.create_connection
  current_user.qube_connections.create!(qube_id: connection_id)
  # ...
end
We'll need this connection to generate the QWC file.
Download the QWC File
Use the connection ID to retrieve its QWC file and give it to the user. A "Download QWC File" action might look like this:
# QuickbooksConnectionsController#download_qwc
def download_qwc
  connection = current_user.qube_connections.find(params[:id])
  qwc = QubeSync.get_qwc(connection.qube_id)
  send_data qwc, filename: 'qube.qwc'
end
After you make sure QuickBooks is running, double clicking the QWC file on your QuickBooks machine will open the Web Connector and prompt you to grant access. To make your life easier, we suggest allowing the Web Connector to access QuickBooks even while QuickBooks is not running.
Generate a Password
The last step before the Web Connector can sync is to generate a password for the connection. This password is used to authenticate the Web Connector with your QUBE application.
# QuickbooksConnectionsController#generate_password
def generate_password
  connection = current_user.qube_connections.find(params[:id])
  password = QubeSync.generate_password(connection.qube_id)
  render json: { password: password } # this can be copied to clip board in JS or sent to the user however you prefer
end
Note that this password is only returned once, and will be regenerated on subsequent requests.
The user will paste the password into the Web Connector when prompted, choose to save it when prompted, and the Web Connector should make its first sync request to your QUBE application!
Altogether Now
ENV['QUBE_API_KEY'] ||= 'sk_your_key_here'

require 'bundler/inline'

gemfile do
  source 'https://rubygems.org'
  gem 'qube_sync'
end

connection_id = QubeSync.create_connection
user.qube_connections.create!(qube_id: connection_id)
puts "Connection created with ID: #{connection_id}"

qwc = QubeSync.get_qwc(connection_id)
File.write('qube.qwc', qwc)
puts "QWC file downloaded to qube.qwc"

password = QubeSync.generate_password(connection_id)
puts "Password: #{password}"
Next Steps
Now that you have the Web Connector set up, you can start making requests to QuickBooks.